Tutorial: Adding an Infrared Effect in Adobe After Effects
This tutorial demonstrates how to create the dreamlike infrared effect commonly used in horror films, science and military shows, thermal imaging, and even medical videos by following a few simple steps in Adobe After Effects.
Welcome to this tutorial on adding an infrared look to your video using After Effects Creative Cloud 2015. The infrared look is commonly used in horror films, science and military shows, thermal imaging, and even medical videos. The final effect can produce a dreamlike visual that you may want to use for a specific project (Figure 1, below). While the best way to accomplish this look is with the use of built-in effects and filters on special IR cameras, many of you probably don't own one of these. After Effects can accomplish this look with a simple workflow.

Figure 1. A typical use of the infrared look. Click the image to see it at full size.
Applying the Colorize - Infrared Effect
To begin, run After Effects, and import a video clip that you'd like to use for this infrared effect. I suggest using a visual that shows the sky, trees, or grass, as these items really stand out when adding this effect. With your video loaded, create a new composition by dragging the video clip from the Project panel to the Create a New Composition icon. This creates a composition for us based on the dimensions of your video.
Next, navigate to the Effects and Presets panel and search for the infrared built-in effect. When you see the Colorize - infrared effect option you can drag this over to your video or to your video layer in the Timeline panel. You now have the infrared look applied to your footage. By all means you can stop here if you're happy with the default look (Figure 2, below).

Figure 2. The Colorize - infrared effect applied with the default settings. Click the image to see it at full size.
Customizing the Effect
To fine-tune the effect, open the Effect Controls panel. You can see on the left in Figure 2 that when we added the effect, After Effects created this look with the use of three separate adjustments. All of these can be modified to achieve a desired look.
Starting from the top, we can make some adjustments in the Solid Composite area. I'll leave the Source Opacity at 100, but change the overall color by selecting the color square. This will open up some color options. I'd like to create more of a nighttime look so I'll choose a red that's not as bright as the default. Once you have a color selected, press OK.
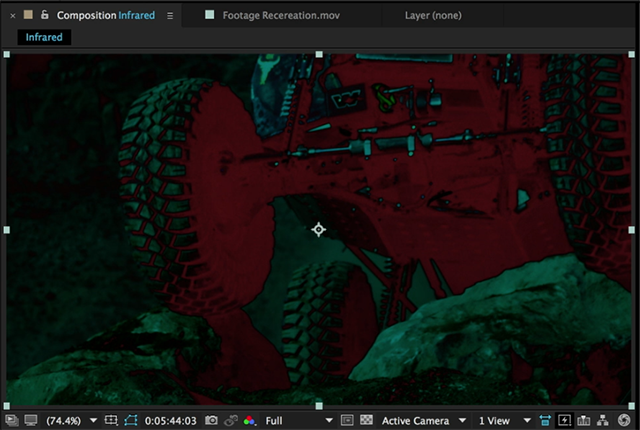
Next, I'll scale back the effect opacity by adjusting the value to 75%. The next area you can play around with is the blending mode. By default, it's set to Exclusion, but you can choose from a range of blending modes. Again, I'm going for a darker look so I'll choose one of the darker blend modes. In this case, I'll go with the difference. Feel free to choose a blend mode that works for you. As I scan through my footage on the timeline, you can see in Figure 3 (below) what this is starting to look like after these adjustments.

Figure 3. The Colorize - infrared effect with the adjustments applied. Click the image to see it full size.
Related Articles
This tutorial demonstrates how to streamline clip length adjustments in Adobe Premiere Pro CC using the handy Rate Stretch tool.