Tutorial: How to Edit in Final Cut Pro X’s Magnetic Timeline
The magnetic timeline is one of the major revolutionary changes in Apple Final Cut Pro X, and one of the areas editors struggle with when they're coming from track-based NLEs. In this tutorial we'll break it down and show you how to make it work for you.
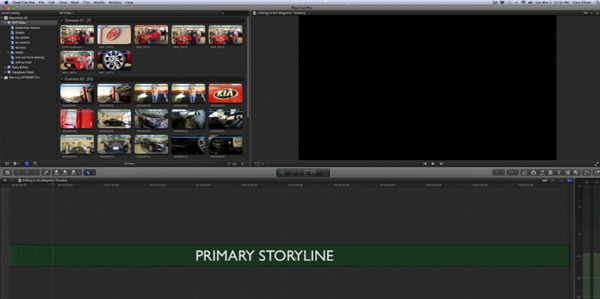
In this tutorial we’re going to learn how to edit in Final Cut Pro’s new magnetic timeline. In designing FCP X, Apple completely reimagined the concepts and layout of the editing timeline. They’ve opted for what’s essentially a trackless timeline. There’s a darker gray strip in the center of the timeline that’s considered the primary storyline, and a lighter gray area above and below where you can connect clips. The concept is simple: You utilize the method of primary storyline to flush out the foundation of your story, and then you add supporting shots via connected clips above or below--cutaways, b-roll, and music.
This new timeline behavior is one of the major revolutionary changes in Final Cut Pro X, so it’s no coincidence it also happens to be one of the areas people have the most trouble with when they’re starting out, especially when they come from track-based NLEs like Final Cut Pro 7 and Adobe Premiere Pro. At first it can be difficult to acclimate to the new timeline format (Figure 1, below), so I’m going to break it down and try to make it easier to understand, and hopefully soften the learning curve. Now that I’ve grown accustomed to using the new timeline style in all the commercial and event edits I do at Cord3Films, I don’t want to go back to the old style. Once you’ve had a chance to learn it, I think you’re going to feel the same way. Let’s get started.

Figure 1. The magnetic timeline with the Primary Storyline highlighted. Supporting and connecting clips and other media go above and below.
Getting Footage to the Primary Storyline
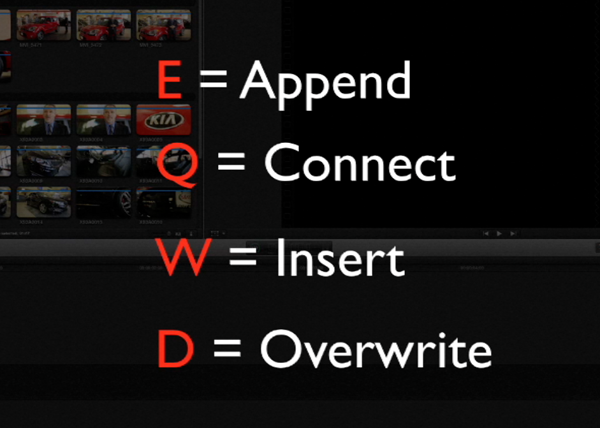
First and foremost, we have to learn how to get footage down to the timeline to begin editing. There are four major types of edits: the Append edit, the Connect edit, the Insert edit, and the Overwrite edit. Apple did a good job of making this very intuitive because they’re all left-hand keystrokes (Figure 2, below).

Figure 2. Keyboard shortcuts for the 4 types of edits
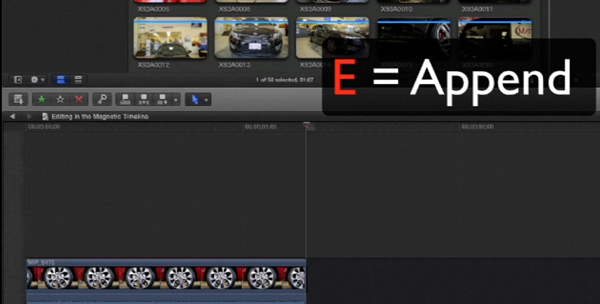
First, we’re going to talk about the Append edit. To begin, we’ll make a small selection from a clip in the Event Library. Then press the E key for the Append edit, and FCP X will drop the selection down to the timeline (Figure 3, below). As we make another selection, and hit E again to append it again, you’ll see it goes right to the end of that.

Figure 3. Making an Append edit
Essentially, Append moves a clip to the very end of your timeline on your Primary Storyline. So, as you continue to make clip selections, and hit the E key again, FCP X will drop the clips at the end of the timeline. In this example, we’ll line up 3 clips using this approach, with each one appearing immediately to the right of the last.
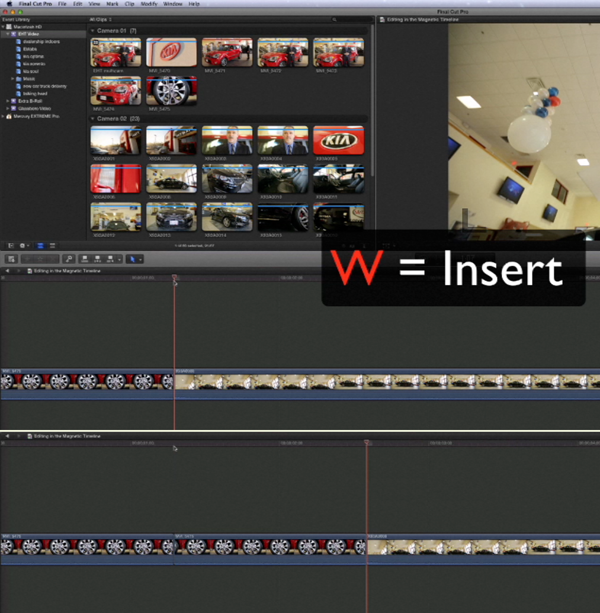
The next type of edit we’ll use is an Insert edit. You use an Insert edit when you want to insert a clip in between two clips that are already on the timeline. You don’t want it to overwrite any of the footage; you just want to insert and push everything downstream to make room for it. To perform an Insert edit, select portion of a clip from the Event Library, move the cursor in between these two edit points, and press the W key to insert the clip, as shown in Figure 4 (below).

Figure 4. Performing an Insert edit--before (top) and after (bottom)
Think of it like this: An insert is a wedge; you’re wedging the clip in. That’s how I remember as W for insert edit. It inserts a clip in between two adjacent clips, pushes everything downstream, and makes the edit longer.
The next edit is the Overwrite edit. For that one you press the D key on your keyboard. I think of it like this: The overwrite is going to overwrite, or delete, any footage that it drops on top of; it’s destructive, so D on your keyboard for overwrite.
To perform an Overwrite edit, selection a clip or a portion of a clip in the Event Library and hit the D key, and FCP X drops the clip right on top of whatever is in the timeline where you drop it, and just overwrites it.
Related Articles
Here's a look at two workflows for applying film grain to your footage in FCP X using cineLook (with and without Gorilla Grain), first with 4k footage shot with the Blackmagic Production Camera, and then with Cinestyle-flattened DSLR footage.
In our first tutorial on the recently released FCP 10.1, we look at the new Libraries feature, which enhances project and media organization and eases the adjustment for editors transitioning from FCP 7.
This tutorial on Apple Final Cut Pro X takes a closer look at color correction in the Inspector, exploring the Balance Color, Match Color, and Color Mask and Shape Mask features.
This tutorial on Apple Final Cut Pro X inspects the Video Inspector, a context-sensitive area of the FCP X interface that allows you to change settings of various filters and settings, and focuses on making basic but effective color adjustments.
In this video tutorial Glen Elliott of Cord3Films looks at FCP X's Timeline Index which provides innovative options for viewing, navigating, and searching your projects, including three different types of timeline markers and the ability to create a navigable To Do list of editing notes that's indispensable for collaborative workflows.
In this tutorial, Cord3Films' Glen Elliott demonstrates how to mix audio from multiple off-camera sources in a multicam edit in Apple Final Cut Pro X.
In part 2 of our series on multicam editing in Final Cut Pro X, Glen Elliott explains how you can accelerate and streamline the multicam-syncing process in Red Giant's PluralEyes 3.
Our Final Cut Pro X tutorial series continues with the first installment of a 3-part series on multicam editing in FCP X, addressing the basics like creating a multicam clip and cutting and switching audio and video using the Angle Editor.
Working with compound clips in FCP X is similar to nesting sequences in Final Cut Pro 7. Once you understand how it works, and how changes to compound clips can ripple across projects, it's a powerful feature that you'll find yourself using more and more.
In this tutorial, we'll look at several ways you can use connected storylines to enhance your FCP X edits and mix in cutaways and creative shots in a quick and efficient way.
This tutorial explores advanced editing techniques in FCP X including back-timing your edits, replacing edits and auditioning, top-and-tail editing, extend edits, trim-to-selection edits, keyboard trimming, and the Precision Editor.
In this first installment of our new tutorial series, Glen Elliott demystifies Final Cut Pro X, illustrates its core functions, and focuses on one of the most powerful new features for organizing, accelerating, and streamlining your edits: metadata keyword tagging.