Tutorial: Multicamera Editing in Adobe Premiere Pro CS6
Adobe Premiere Pro Instructor extraordinaire Luisa Winters explains how to use the new and enhanced Multi-Camera Monitor for quick and efficient multicam edits in Adobe Premiere Pro CS6 in this video and text tutorial.
Welcome to this tutorial on how to use multi-camera editing using Adobe Premiere Pro CS6. As anyone who shoots events with multiple cameras knows, using a multicamera interface like the one found in Premiere Pro CS6 can be a huge timesaver in post, making your multicamera edit as efficient as a live switch (though not nearly as high-pressure).
Finding a Sync Point
To do a multicam project using Premiere Pro CS6 the first thing you need to do is to import the footage from your cameras into the Project Panel (Figure 1, below). Next, you need to tell Premiere Pro where the clips sync.

Figure 1. Clips from my 7-camera shoot in the Project Panel.
All of the clips shown in Figure 1 have slightly different timecode numbers. When I was shooting the 7-camera shoot captured in these clips, I used a hand-clap to sync the cameras. So what I need to do is to find this clap in all of the clips and place a marker in this place to tell Premiere Pro to use this as the common point between all of the cameras.
To accomplish this the easiest way is to maximize the Project Panel (Figure 2, below). To maximize this panel, place your mouse cursor on top of it and press the accent grave (‘) or tilde (~) key on your keyboard.

Figure 2. The Adobe Premiere Pro CS6 Project Panel maximized for easier viewing.
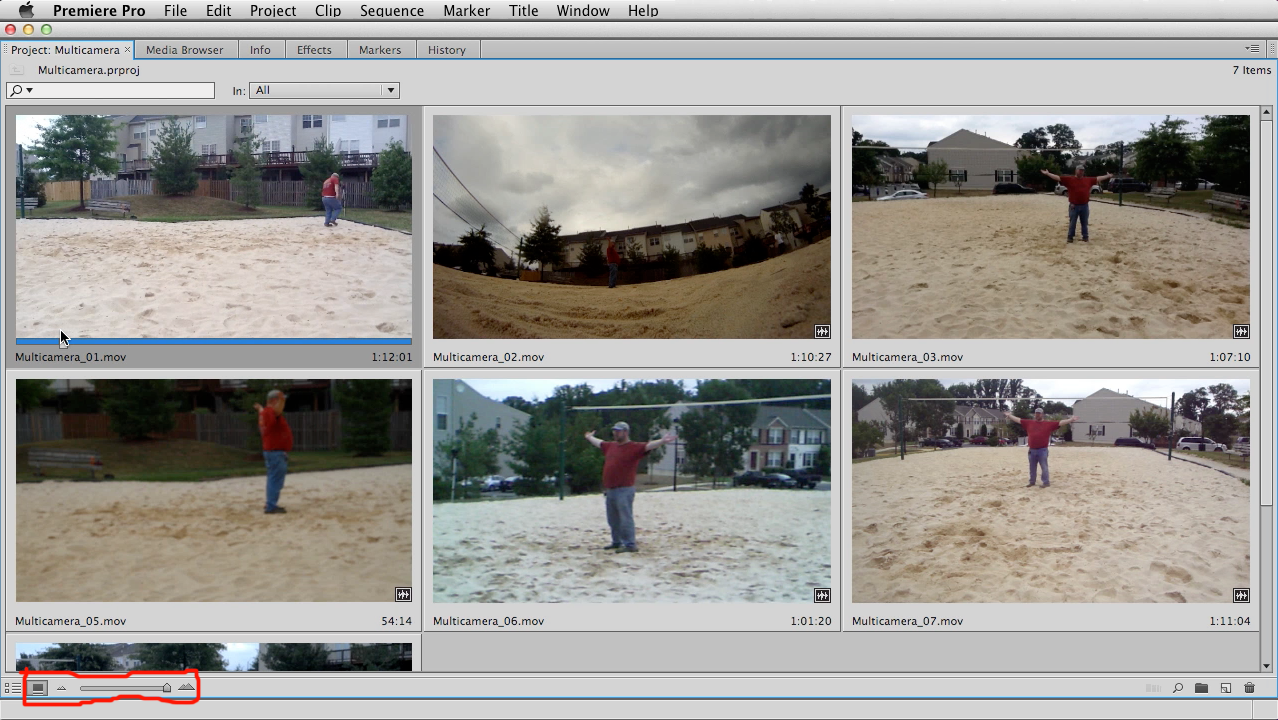
You can also change the view to thumbnails by clicking the icon at the bottom left of the screen shown in Figure 3 (below), and change the size of the thumbnails using the adjacent slider (also shown in Figure 3).

Figure 3. Changing to thumbnail view in the Project Panel.
Now you can click on the clips one at a time and find your hand clap (or whatever common point you plan to use for syncing the clips) right here in the Project Panel. Play this clip using the J, K, and L keys as your playback controls. Once you find the general location of your sync point, press the K key and go frame by frame by pressing and holding the K key and using L to go forward one frame or J to go backwards one frame.
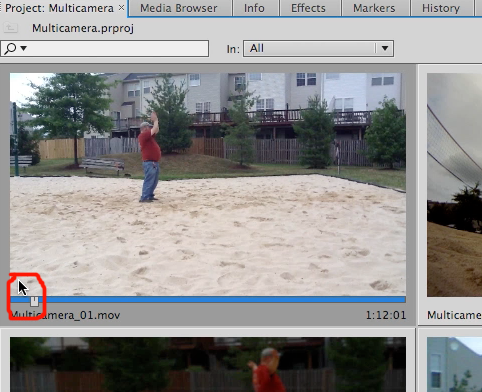
Once you have identified the exact frame where your synch point occurred, mark an In point by using the keyboard shortcut I (Figure 4, below). Follow the same procedure for all of your remaining clips, setting an In point for each one at the specified sync point. J, K, and L are great shortcuts for this.

Figure 4. In point marked at the handclap for camera 1.
Related Articles
Two types of noises degrade the audio you shoot with your video: random noises like microphone clicks and pops, and consistent noises like white noise or air conditioning hum. This tutorial demonstrates how to remove both of them in Adobe Audition CS6.
Jan Ozer sits down with Bill Roberts to discuss the trends impacting the future direction of Adobe Creative Suite for video pros, including the decline of 3D, the rise of 4K, and second-screen viewing. Other topics included the growth of Creative Cloud, and the development arc of Apple Final Cut Pro X.
In this tutorial you'll learn how to maximize the brightness and contrast of your video in Adobe Premiere Pro CS6 using the Brightness, Contrast, and Gamma Correction controls for effective and balanced adjustments.
Video encoding and editing expert Jan Ozer provides three useful tips that will enhance your workflow and get you out of some editing jams in your Adobe Premiere Pro projects: editing audio without unlinking; Fill Left and Fill Right to create stereo audio; and creating nested sequences for smoother edits and creating reusable set pieces in your projects.
There have been lots of comparisons between Final Cut Pro X and Premiere Pro CS6, with most focusing on features and workflows. This article discusses a series of multiple-format benchmark tests that analyzed comparative performance between the two programs.
The new version of Adobe Media Encoder, included in the just-released CS6 collection as well as as a standalone product, offers significant improvements in usability and performance, as well as new features. Here's what you need to know about it.
In the final installment of the NAB Interviews with Shawn Lam, Shawn talks with Adobe's Al Mooney about key new features in Premiere Pro CS6 and Adobe Media Encoder.