Tutorial: Streamlining Video Encoding in Sony Vegas Pro
In this fifth tutorial in our six-part series on Sony Vegas Pro 11, we're going to talk about the Render dialog box. Every project you work on, whether it's delivered on the web, or even on DVD or Blu-ray Disc, has to go through a rendering stage, so you'll find yourself getting quite familiar with it as you do more project. In Vegas Pro 11, Sony has added some new features to the Render dialog, and they've totally revamped the way that it works.
Searching
A couple more quick things about this dialog box. You have a search field, so if you know you want to render for DVD, you can type in the letters "DVD," and it filters out everything except those templates that have the letters "DVD" in them.
With the Search Rendered Templates box, the ability to mark and show only favorites, and the ability to show only rendered templates that match your Project Settings, you've got three really powerful ways to filter out all those hundreds of different presets in your list.
Using the Stretch Video Option
One other quick tip I want to show you today about the Render dialog box, and the options, is when you are rendering a file to DVD, but you've started with high-definition source material, sometimes you'll need to select the checkbox next to Stretch video to fill output frame (Figure 9, below). This will allow for the very slight differences you have in the aspect ratio of resolutions between HD material and widescreen DVD, so that you don't have black bars on either the left and right sides, or the top and bottom.
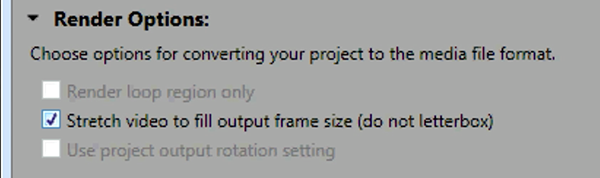
Figure 9. Selecting the "Stretch video" option
Also, with a DVD or Blu-ray, if you are going to enable chapter markers, you can do that in DVD Architect, but you can also do it right from the Vegas timeline. If you've set markers in the Vegas timeline, and you want those to be the chapters in your program on the DVD or the Blu-ray, click the Save Project Markers in Rendered Media File. When you bring the file into DVD Architect, the markers will act as chapters.
Now, be aware, if you have this option set on your template and you actually don't want that--for example, you've used markers for some other reason in the course of editing the file, and they're still in the file when you come into the Rendering dialog box--then make sure you uncheck that so that the markers don't follow your project into DVD Architect. Otherwise, you'll wind up with a bunch of unwanted chapters, and once they're in there, it's like that cake: They're baked in, and you can't get them out.
Rendering a Region
I almost always set a region in my Projects (Figure 10, below), and I save that in the Vegas project. That way, when I come back to it, I always know what it is that I've rendered.
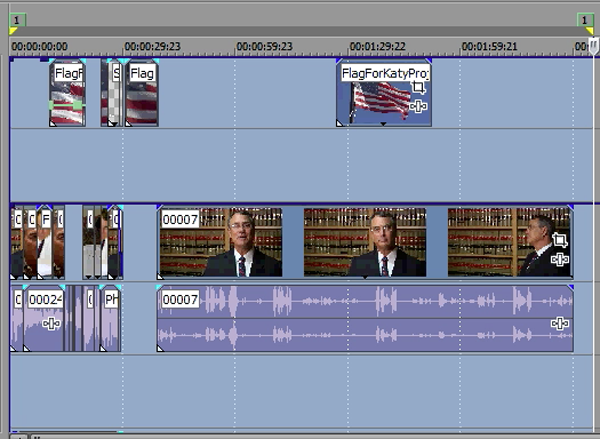
Figure 10. Setting a region
So one thing you can do is, in the Render dialog box, make sure you have Render loop region only selected in your template (Figure 11, below), and that way it'll render only the region that you have specified.
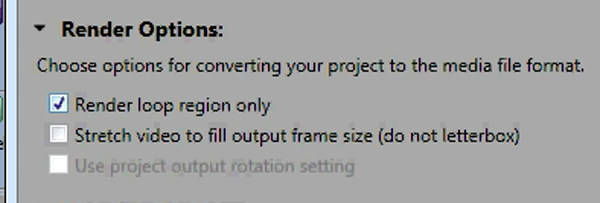
Figure 11. Rendering the loop region only
Saving Metadata
The last option you'll find in the dialog, under the Metadata Options, is Save project as path referenced in rendered media file. If you choose this option, Vegas will save the path information about your Vegas .veg Project file as metadata in the rendered file. What is metadata, you ask? Well, that term comes from the information systems in the IT world, and it basically means that it's "data about data."
If you're a broadcast house and you keep all of your media assets together, and store all of your renders and project files in kind of a centralized media server location, it can actually work very well for you.
That wraps up this tutorial on the Render dialog box. It's a lot of information about one window, but I think you'll agree that some of the options, specifically those used in filtering, with the Search box, the Favorites, and the Match Media, will help you access more easily the four, five, or six templates that you use the most often. Thanks for reading. We'll see you next time in Vegas.
Related Articles
A quick look at the latest new features in Sony Vegas Pro 13, including the Vegas Pro Connect iPad app, a proxy-first workflow for mobile and 4K editors, and true, four-range loudness meters.
David McKnight demonstrates a quick, easy way to generate sharp-looking titles for your Vegas Pro projects that requires no additional plugins.
Vegas Pro 12, the new version of Sony's flagship NLE that debuted a few weeks ago, boasts several new features for online video production pros including simplified color matching, advanced mask creation and manipulation, and increased 64-bit support, while shipping as part of a new suite that includes Sound Forge Pro 10 and the HitFilm 2 Ultimate effects package.
The new mixer layout in Sony Vegas Pro 11 makes editing audio for video in Vegas feel like you're using a pro hardware mixer. Vegas instructor David McKnight explains how it's done.
Sony Vegas instructor David McKnight continues his video tutorial series with a look at Vegas' new GPU Assist feature, which enables Vegas editors to leverage the processing power of supported NVIDIA and AMD video cards to get full-frame previews of loaded timelines and accelerate rendering with many popular codecs.
Sync Linking is a cool new feature in Sony Vegas Pro 11 that allows you to group clips of events and move and control them in the timeline with a single Master clip, while still being able to fine-tune subordinate clips within the group.
In this tutorial you'll learn how to make the most of Vegas's new by-parameter keyframing capabilities for effects plug-ins that ship with Vegas Pro 11 using the new Sony Text & Titles plug-in as an example.