Tutorial: 3D Title Creation With NewBlue FX Titler Pro
David McKnight explores the range of features in NewBlueFX Titler Pro that allow editors to produce creative titling effects, animations, and extrusions along the 3D plane using both manual controls and a host of preset styles and templates.
Next, in the Attributes dialog on the left side of the interface, select the Style tab, click on +2D, and select Shadow from the drop-down menu that appears (Figure 8, below).
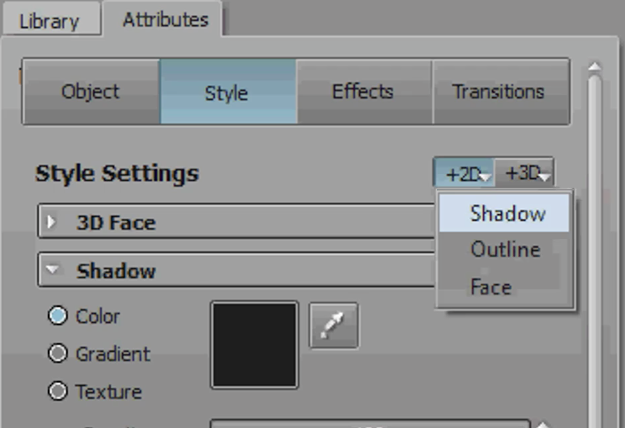
Figure 8. Setting Shadow attributes in the Style tab
You'll also see the Outline option, which allows you to choose the thickness, and the color of an outline around the text (Figure 9, below). I don't normally use outlines. Your other option is Face. We'll come back to that in the next section.
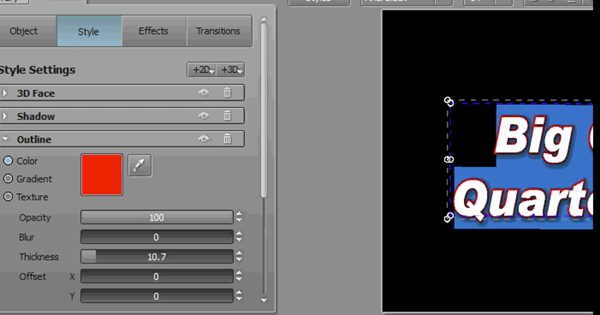
Figure 9. Setting Outline attributes in the Style tab
Hit Z again. In Figure 10 (below), you can see that I added a little bit of a depth using the Shadow attribute. Note that this is a shadow; it's not actually an extrusion.

Figure 10. The shadow in effect
Adding Extrusions
Let's add an extrusion. Back in the Style tab in the Attributes window, under Style Settings, choose 3D Face. In Figure 11 (below), you'll notice one of the settings you can adjust here is Extrusion.
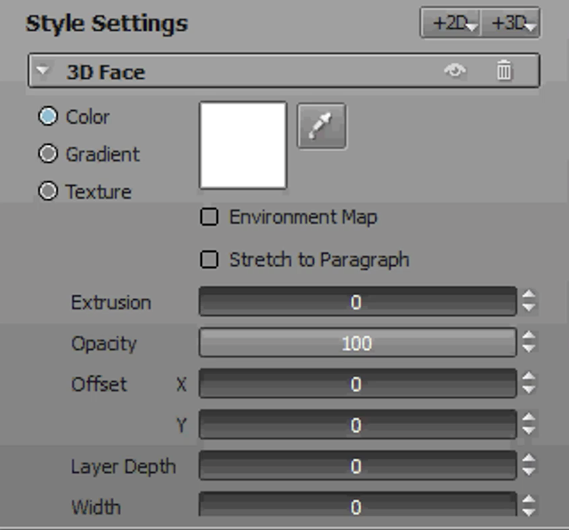
Figure 11. 3D Face Style Settings
By clicking and dragging in the Extrusion field, as shown in Figure 12 (below), you can increase and decrease the amount of extruded text you have on your title.
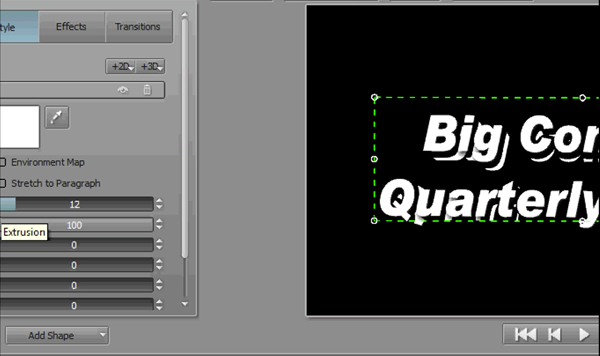
Figure 12. Adjusting the Extrusion setting to add depth to your title
It really becomes apparent if you give it just a little bit of a bump one way or another in the Z-axis using the big circle (Figure 13, below) to get a side view and a bit of an underneath view.

Figure 13. Extrusion with a Z-axis bump
Using Titler Pro's Preset Effects and Styles
Everything we've worked with up to this point has involved a single text event with effects we've built from the ground up. One of the things I really like about Titler Pro is it already comes with a library of presets of effects and styles that you can use to get your started. This reminds me a lot of the old Title Deko program that we used with the original Pinnacle Studio product in the early 2000s.
To access these presets, go to the panel on the left side of the interface, click on the Library tab, and jump right into Styles (Figure 14, below). These are styles that are included with the product. There are quite a lot of them.
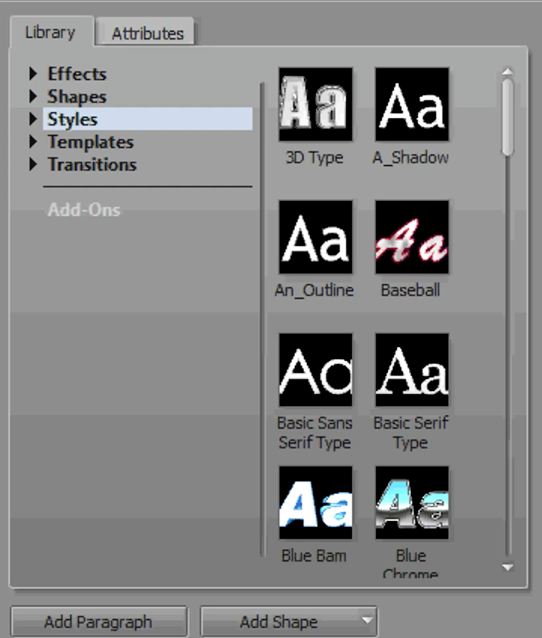
Regardless of how you have your title set up, you can hover over any of these styles and see how they will look when applied to your text (Figure 15, below). Using these Styles will apply, in many cases, color, typeface, 2D effects, 3D effects, extrusions, all built into a style. After you decide on one that you want, you can just click and drag that over. And now your title's all set with that style.
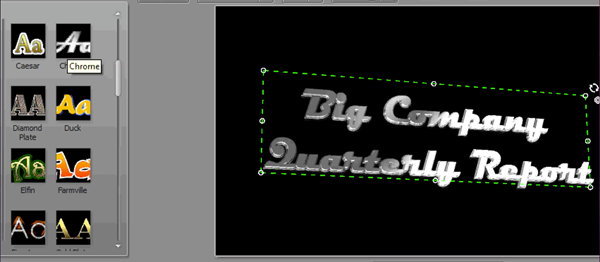
Figure 15. Sampling the Chrome effect
Related Articles
Titler Live Complete 4 is a very powerful on-air graphics solution that is surprisingly affordable, easy to use, and easy to connect with several video switchers and data sources.
Titler Pro 5 is a time-saving tool that produces some stunning results, with a vast array of templates and pre-built animations that can add a lot to your videos.
A new year, a new and inviting collection of video utilities from NewBlueFX, one of the leading players in the video plug-in game. In this article, we'll look at their sixth volume of plug-ins billed as "essential." Are they? Read on to find out.
Sony Vegas Pro 12 to ship in 2 configurations: Collection (including DVD Architect 5.2, and Dolby Pro Encoder) and Edit (Vegas Pro only); key new features include expanded edit mode, new 64-bit audio plug-ins, project interchange, smart proxy workflow, project media tagging, color match, Panasonic P2 support, FX masking, and more
NewBlueFX ColorFast is a new color correction, color grading, and color enhancement plug-in for Vegas, Premiere Pro, Final Cut Pro X, Avid, and EDIUS. In this video review/tutorial, we'll work with a piece of footage from a recent project that calls for all three kinds of color adjustment, and show how to accomplish each task in ColorFast.