Tutorial: How to Edit in Final Cut Pro X’s Magnetic Timeline
The magnetic timeline is one of the major revolutionary changes in Apple Final Cut Pro X, and one of the areas editors struggle with when they're coming from track-based NLEs. In this tutorial we'll break it down and show you how to make it work for you.
Applying a Connect Edit
So, those are the three edits you’ll use in the Primary Storyline. There’s one more edit left: the Connect edit. It’s a little bit less intuitive in terms of its keyboard shortcut (Q). What that does is it connects a clip outside of the primary storyline, or on top of, or below.
You begin as you would with the other types of edit, by selecting a clip or a portion of a clip from the Event Library, then move your cursor to where you want to connect the clip, and press the Q key to connect the clip, and FCP X drops it on top of the primary storyline (Figure 5, below).
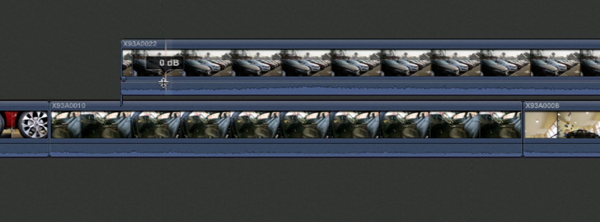
Figure 5. A Connect edit places a clip on top of or below the Primary Storyline.
As explained earlier, the gray center line is the Primary Storyline, and that’s the area of the new FCP X timeline that is considered magnetic. If you grab the last clip in the Primary Storyline and try to drag it out to create a gap, it snaps right back, the same thing with this. So, things kind of stay in their place, and FCP X doesn’t allow you to move or nudge them around.
This can feel limiting at first; it kind of feels like you’re wrestling with a jellyfish. It’s like you can’t get it to move and go where you want it to go. But it’s different with connected clips--those you position outside the Primary Storyline. You can drag and move them around and they stop and stay where you move them, very similar to Final Cut Pro 7.
Why is the Primary Storyline Magnetic?
There’s good reasoning why the primary storyline functions magnetically. It allows things to move and stay in sync. For example, let’s say you’d dropped a clip in the area about the Primary Storyline that was a cutaway to the shot directly below it in the Primary Storyline. And then you needed the primary shot to move later in the timeline, but you still needed the b-roll to be associated with it and to stay in its exact position relative to it, the interlocking nature of the Primary Storyline and the connected clips associated with it keeps them in sync.
As you can see in Figure 6 (below), there’s a little stake that connects the connected clip shown in the screenshot to this Primary Storyline clip directly below it.
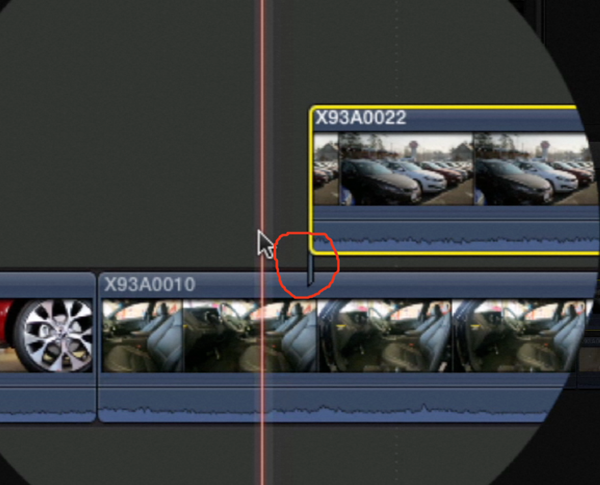
Figure 6. The stake indicates connected clips
So you can grab the clip in the Primary Storyline and move it, and the connected clip will move with it (Figure 7, below).
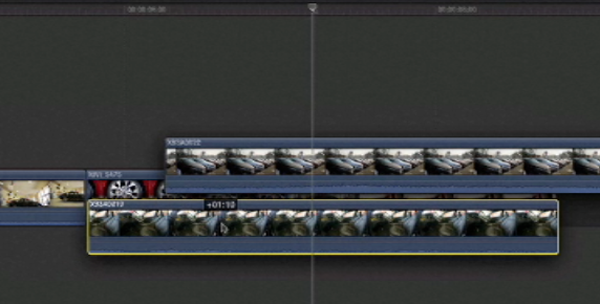
Figure 7. Moving connected clips in unison
How the Magnetic Primary Storyline Functions
Let’s take a closer look at the way the magnetic, primary storyline functions. As you saw earlier, you can’t simply drag and move a clip as you could in FCP 7; clips in the Primary Storyline want to stay in their own position. If you click and drag and continue to move a clip out of its position, you’ll see a lighter blue bounding box area where it was. As you move it closer to an edit point you’ll see a blue vertical line, on the edit point that allows you to shift it and actually physically move it to that area (Figure 8, below).
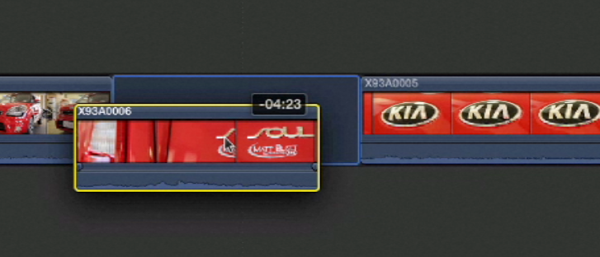
Figure 8. Moving a clip in the Primary Storyline
This is actually very helpful. I can’t tell you how many times in editing I’ll have a sequence of shots and I’m not quite sure what order I want the shots in. And this is an easy way to shuffle your shots around and try shots in different order with various clips. It keeps everything in sync and lined up. You’re not overwriting or deleting anything, but it allows you to rearrange everything on the fly. It’s very effective and I use it constantly.
The Primary Storyline will not allow gaps at any time. You can delete a clip and automatically close that gap. There is a way to delete a clip and leave a gap--hold down the Shift key and press delete. This keystroke combination deletes the clip and leaves a “gap clip” in its place. So, no matter what, there’s no way to leave any empty space in between any things, it always seals it up with a gap clip.
Even if you go up into the Event Browser, choose a shot, move it downstream past your last edit, and force a gap in there by, say, doing an overwrite edit, it will overwrite it there, but that empty space between the last edit and where you overwrite it will be filled with a gap clip (Figure 9, below).
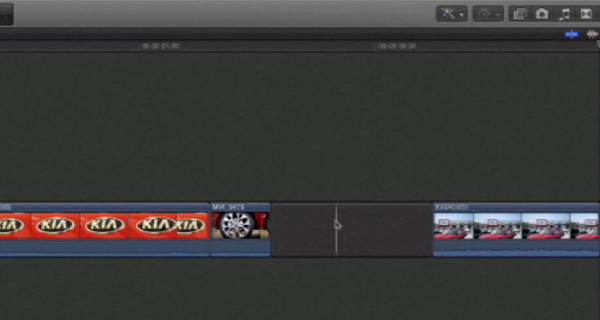
Figure 10. Creating a gap clip
Related Articles
Here's a look at two workflows for applying film grain to your footage in FCP X using cineLook (with and without Gorilla Grain), first with 4k footage shot with the Blackmagic Production Camera, and then with Cinestyle-flattened DSLR footage.
In our first tutorial on the recently released FCP 10.1, we look at the new Libraries feature, which enhances project and media organization and eases the adjustment for editors transitioning from FCP 7.
This tutorial on Apple Final Cut Pro X takes a closer look at color correction in the Inspector, exploring the Balance Color, Match Color, and Color Mask and Shape Mask features.
This tutorial on Apple Final Cut Pro X inspects the Video Inspector, a context-sensitive area of the FCP X interface that allows you to change settings of various filters and settings, and focuses on making basic but effective color adjustments.
In this video tutorial Glen Elliott of Cord3Films looks at FCP X's Timeline Index which provides innovative options for viewing, navigating, and searching your projects, including three different types of timeline markers and the ability to create a navigable To Do list of editing notes that's indispensable for collaborative workflows.
In this tutorial, Cord3Films' Glen Elliott demonstrates how to mix audio from multiple off-camera sources in a multicam edit in Apple Final Cut Pro X.
In part 2 of our series on multicam editing in Final Cut Pro X, Glen Elliott explains how you can accelerate and streamline the multicam-syncing process in Red Giant's PluralEyes 3.
Our Final Cut Pro X tutorial series continues with the first installment of a 3-part series on multicam editing in FCP X, addressing the basics like creating a multicam clip and cutting and switching audio and video using the Angle Editor.
Working with compound clips in FCP X is similar to nesting sequences in Final Cut Pro 7. Once you understand how it works, and how changes to compound clips can ripple across projects, it's a powerful feature that you'll find yourself using more and more.
In this tutorial, we'll look at several ways you can use connected storylines to enhance your FCP X edits and mix in cutaways and creative shots in a quick and efficient way.
This tutorial explores advanced editing techniques in FCP X including back-timing your edits, replacing edits and auditioning, top-and-tail editing, extend edits, trim-to-selection edits, keyboard trimming, and the Precision Editor.
In this first installment of our new tutorial series, Glen Elliott demystifies Final Cut Pro X, illustrates its core functions, and focuses on one of the most powerful new features for organizing, accelerating, and streamlining your edits: metadata keyword tagging.