Tutorial: Advanced Editing Techniques in Apple FCP X
This tutorial explores advanced editing techniques in FCP X including back-timing your edits, replacing edits and auditioning, top-and-tail editing, extend edits, trim-to-selection edits, keyboard trimming, and the Precision Editor.
Auditioning
There are going to be times in editing where you're going to want to experiment with various shots. I know there are several instances where I'm kind of mulling over various options of a particular shot.
For example, in the car dealership project, I know I need to include a shot of a black car that was on the lot. I shot the car from multiple different angles, but I just want to put one shot of it in there. I'm not sure which shot will work best with the edit.
So I can go ahead and click all the different angles that I shot of the car, and drag them down over top of one another, as shown in Figure 8 (below). That way I can just visually see them all, and just kind of experiment with them. I can move my cursor and I can highlight them, hitting the V key to toggle visibility on and off. I can just kind of experiment, and see what looks good.
Once I have my pick, I can delete the rest and drag it in.
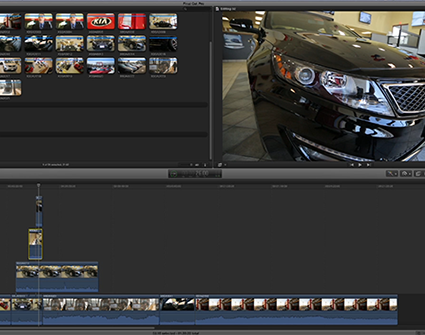
Figure 8. Dragging clips down to the timeline on top of one another to compare them
But there's a much better way of doing this. Apple introduced a new feature called Auditioning, which is a slick way of experimenting with shots or auditioning shots. It starts the same way you start a replace edit. We have this shot of the black car, and we want to create an audition. We’ll grab the other angles that we shot of this car, and drag them down right over top of the clip like we're replacing it, and let go. But this time, when the dialog appears, we're going to choose Replace and Add to Audition.
FCP X replaces that shot, and a little spotlight icon shows up (Figure 9, below), indicating that there's an audition.
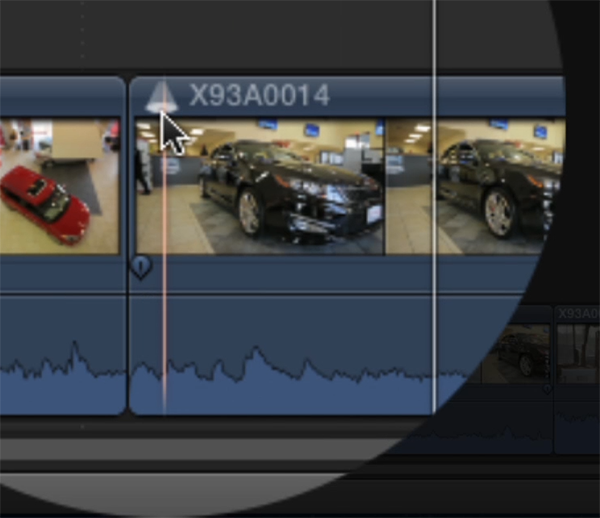
Figure 9. The spotlight icon indicates that there’s an audition.
If you click that spotlight icon, it'll open up your audition, and you can see the two shots--your two options for this edit (Figure 10, below). You can go back and forth and watch your edit, and try these two different shots.
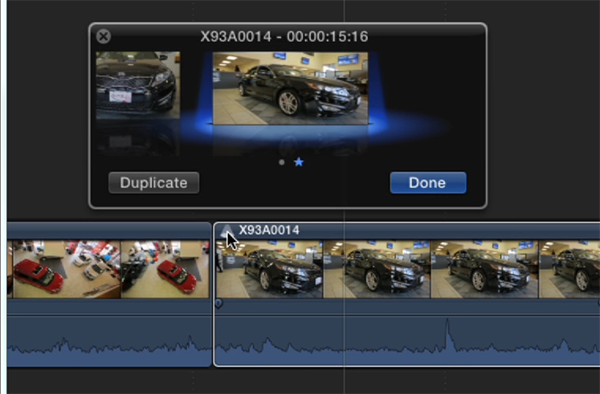
Figure 10. The 2 shots in the audition
You can continually add various shots to the audition by dragging the clips down and choosing Add to Audition. This doesn’t replace the current pic; it simply adds another clip to the audition, while keeping the current shot selected. I can see this being a very useful feature.
Top-and-Tail Editing
One of the tasks you'll find yourself performing all the time when editing is the process of going through your timeline and just tweaking edit points and trimming them in and out and dragging them around. One of the edits you’ll find useful when you’re fine-tuning your timeline is called a top-and-tail edit, which basically means tweaking your In points and Out points, and there are some keyboard shortcuts that make it go very smoothly.
Let’s say you're moving your cursor in the timeline and you know that we want to start your shot at a specific point. Instead of clicking and coming down and grabbing and rippling, there’s a quick keyboard shortcut that makes it really fast.
First you’ll want to find your start point for the edit, and on the keyboard to trim the In point of the clip to where the cursor is, hold down the Option key, and hit the left bracket (Figure 11, below). As soon as you hit that, you're going to see the In point move to where my cursor is with one click.
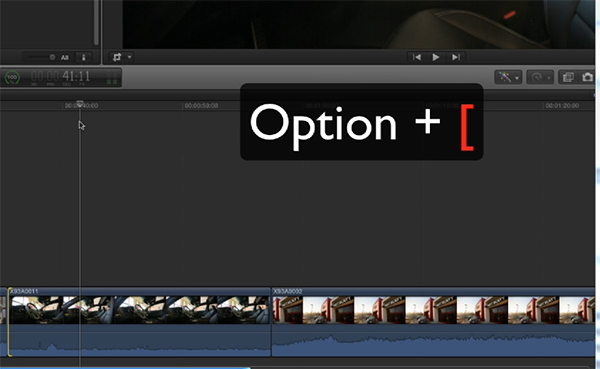
Figure 11. Hit Option+[ to move the In point to where the cursor is in a single click.
Scrub a little bit further down the clip, find the end-shot right. And now hold down the Option key, and hit the right bracket, which moves the Out point of the clip to where the cursor is (Figure 12, below).
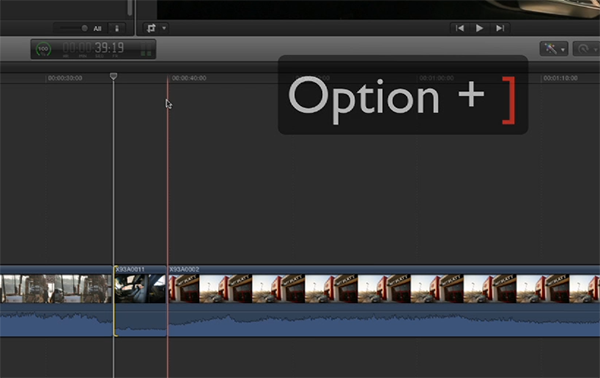
Figure 12. Hit Option+] to move the Out point to where the cursor is in a single click.
So with just two keyboard shortcuts, you can see how quick this can be going through the timeline finding the beginning of a shot and the end of a shot. Two clicks to a top-and-tail edit.
Related Articles
Here's a look at two workflows for applying film grain to your footage in FCP X using cineLook (with and without Gorilla Grain), first with 4k footage shot with the Blackmagic Production Camera, and then with Cinestyle-flattened DSLR footage.
In our first tutorial on the recently released FCP 10.1, we look at the new Libraries feature, which enhances project and media organization and eases the adjustment for editors transitioning from FCP 7.
This tutorial on Apple Final Cut Pro X takes a closer look at color correction in the Inspector, exploring the Balance Color, Match Color, and Color Mask and Shape Mask features.
This tutorial on Apple Final Cut Pro X inspects the Video Inspector, a context-sensitive area of the FCP X interface that allows you to change settings of various filters and settings, and focuses on making basic but effective color adjustments.
In this video tutorial Glen Elliott of Cord3Films looks at FCP X's Timeline Index which provides innovative options for viewing, navigating, and searching your projects, including three different types of timeline markers and the ability to create a navigable To Do list of editing notes that's indispensable for collaborative workflows.
In this tutorial, Cord3Films' Glen Elliott demonstrates how to mix audio from multiple off-camera sources in a multicam edit in Apple Final Cut Pro X.
In part 2 of our series on multicam editing in Final Cut Pro X, Glen Elliott explains how you can accelerate and streamline the multicam-syncing process in Red Giant's PluralEyes 3.
Our Final Cut Pro X tutorial series continues with the first installment of a 3-part series on multicam editing in FCP X, addressing the basics like creating a multicam clip and cutting and switching audio and video using the Angle Editor.
Working with compound clips in FCP X is similar to nesting sequences in Final Cut Pro 7. Once you understand how it works, and how changes to compound clips can ripple across projects, it's a powerful feature that you'll find yourself using more and more.
In this tutorial, we'll look at several ways you can use connected storylines to enhance your FCP X edits and mix in cutaways and creative shots in a quick and efficient way.
The magnetic timeline is one of the major revolutionary changes in Apple Final Cut Pro X, and one of the areas editors struggle with when they're coming from track-based NLEs. In this tutorial we'll break it down and show you how to make it work for you.
In this first installment of our new tutorial series, Glen Elliott demystifies Final Cut Pro X, illustrates its core functions, and focuses on one of the most powerful new features for organizing, accelerating, and streamlining your edits: metadata keyword tagging.