Review: Videon EdgeCaster EZ (w/ LiveEdge Core 8.5)
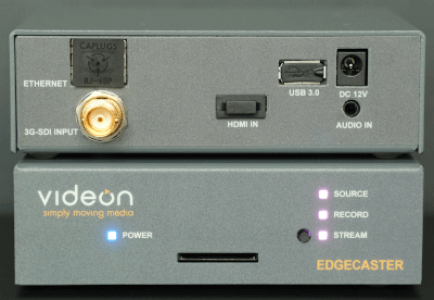
This review will highlight Videon’s EdgeCaster video encoding appliance (Figure 1, below) and explore its unique LiveEdge Compute technology for encoding and delivery, as well as how it works with popular video streaming platforms. I’ll also discuss why many video production and remote production teams will likely move to a tool such as this in the future for streaming delivery.

Figure 1. Videon EdgeCaster
About EdgeCaster
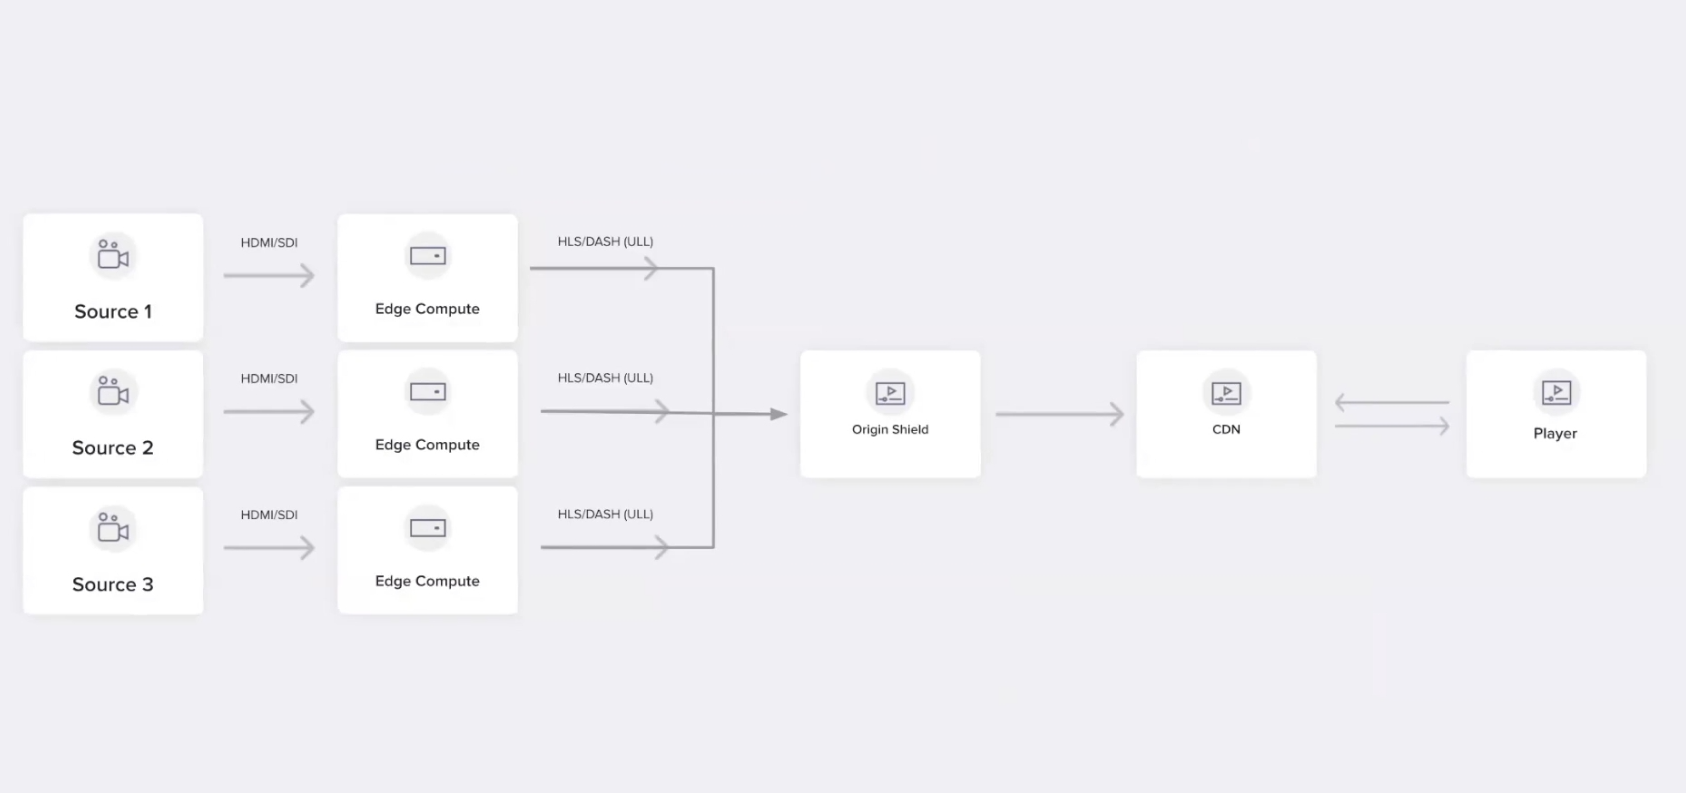
Videon’s EdgeCaster goes beyond the capabilities of the traditional video encoding model. With most encoders, when a user takes a video and audio source into a video encoder for compression, the device encodes the content into their desired codec to send to the streaming server, video platform, or cloud using the RTMP protocol. Though it looks like other video encoding appliances with its compact form factor and HDMI and SDI inputs, EdgeCaster adds two key features that make it distinct. It’s a video encoder, a packager, and an origin server all in one box (Figure 2, below).

Figure 2. The EdgeCaster workflow, which combines the capabilities of an encoder, packager, and origin server
Using EdgeCaster
If you’re using EdgeCaster for the first time, you’ll need to do the following:
- Connect to your network via an Ethernet cable.
- Connect to power via the power supply.
- Connect to your video source via HDMI or SDI.
- Finally, visit https://support.videonlabs.com and select “First Time Setup,” then follow the on-screen instructions.
Once you complete the setup, you’ll configure EdgeCaster by using the Videon Discovery App. This will be the method you’ll use for accessing, updating, and using EdgeCaster going forward.
Setting up an HDMI Source
In this review, we’ll set up EdgeCaster to use an HDMI source. To begin, turn on your HDMI source and confirm that it’s connected to EdgeCaster. Then open the Videon Discovery app (Figure 3. below).

Figure 3. The Videon Discovery app
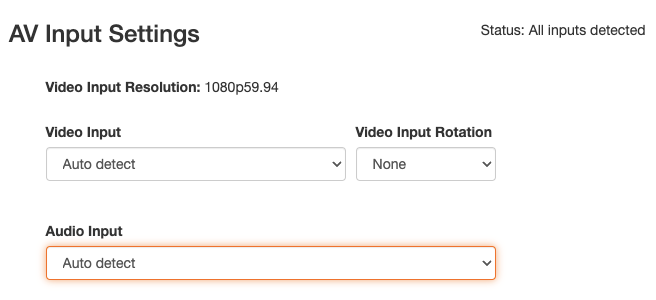
Next, choose Open under the Dashboard. The Dashboard should open to the AV Input section of the EdgeCaster UI (Figure 4, below).

Figure 4. EdgeCaster’s AV Input dialog with my inputs auto-detected
With the Web UI up and running and the source connected to EdgeCaster, your Status should show All inputs detected. This means you can begin configuring your sources.
With Auto detect selected, EdgeCaster will automatically detect your source’s input resolution. In my case, that’s 1080p60, though Edge Caster reads my Video Input Resolution reads my input as 1080p with a fractional frame rate of 59.94 fps. Additionally, under Video Input and Audio Input, since Auto detect is selected, there’s no need to designate the input. This feature will work well for novices who might not know the specs of their input source
The options available under Video Input Resolutions include HDMI Video, SDI Video, and Auto detect. If you move over to the Video Input Rotation, you can select whether you want your video to display without rotation by choosing None. You can also select 90, 180, or 270 degrees to rotate the video. As you travel down to the audio settings, you’ll see the options to choose Embedded Audio, 3.5mm, or Auto detect.
For this test, I’m using a Hero 5 Black GoPro with HDMI output and GoPro’s HDMI Live settings. You can see my AV Input preview in Figure 5. EdgeCaster gives you the option to turn this on or off. I like having it only since it shows the video source coming in as well as VU meters for audio. As shown in Figure 5 (below), you can input the width for your source and choose the frequency of how often you receive updates.

Figure 5. EdgeCaster’s AV Input preview
Now, I also want to bring attention to the orange Save button you see to the right of the AV Preview. This is the Save button you’ll use for any changes you make on your current page of the Web UI, and it’s located at the bottom of the Web UI. Be sure to click it whenever you make changes.
The last item we’ll discuss on the AV Input page is the Graphic Overlay (Figure 6, below). This allows users to add an image to whatever source is used. Similar to the AV Input Preview, you turn this option on or off. To add a new image, you’ll click the pencil icon and select the image you’d like to use. To remove an image, click the X button. You can adjust the settings you see in Figure 6 and they’ll appear in AV Input Preview window.

Figure 6. EdgeCaster’s Graphic Overlay window
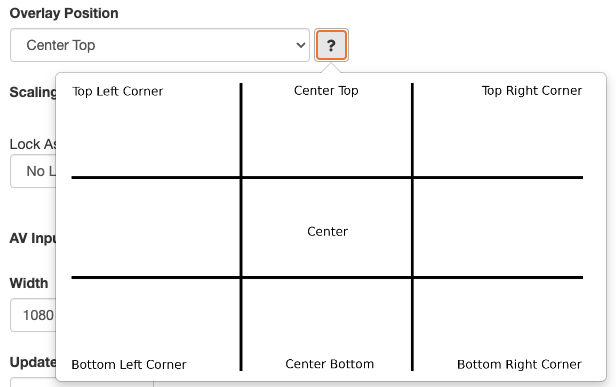
If you click the Overlay Position drop-down menu, you’ll see several options available for positioning your image overlay (Figure 7, below). However, if you can’t decide on an option to use and need a little help, click the ? button to the right of the Overlay Position drop-down menu. This will display a nice graphic showing where the image will display. This is a great feature for advanced users and novices alike.

Figure 7. Positioning an image overlay
Companies and Suppliers Mentioned